Tuesday, April 18, 2017

Sparse Cloud tests


I decided to do a couple of Agisoft Photoscan sparse cloud tests to see how the low poly models would look. Although the resulting geometry isn't super clean, the texture sampling looks great and it's a pretty good start for simplification or prototyping work.

In the first example it's easy to tell where some of the rock forms have lost definition. The last one- the rock cave, is actually a pretty nice little scene. I wish more of the sand had turned out, but it's aways after the fact that you realize you missed some vital angles.


Sunday, April 16, 2017

Another one from near Marshall's beach, this boulder is composed of serpentinite, a rare rock type that is most often developed in subduction zones, where one tectonic plate is subducted under another.

This boulder appears to contain an asbestos vein network. In addition to asbestos, serpentinite  can contain high levels of magnesium, chromium, and nickel. My advice- don't lick it.

Beach Boulder, Marshall's beach, California, USA.

Taken near Marshall's beach, California, USA, not far from the city side of the Golden Gate Bridge.


The terrain of the beach turned out to be pretty treacherous, and is made up more of rocks and boulders from the nearby cliffs than sand. Making my way around the boulder without twisting my ankle made it slow going, but I really liked the rust-red features of the rock and wanted to make a special effort to capture them.

You can see the boulder in the background. 
The beach was a little messy. 

The CPL helped to capture the true color of the rock- take a look at this other post which talks about what is is, and how to use a CPL.

As a side, the beach has large deposits of the rock Serpentinite, a greenish colored rock that occurs at tectonic plate boundaries.


Saturday, April 15, 2017

Photogrammetry Kit- CPL, or Circular Polarizing Lens

I recently bought a CPL, or Circular Polarizing Lens, for my Photogrammetry shoots, and I wanted to write up if it was actually useful for photogrammetry.

the CPL is the middle lens, between the ND4 on the right and the UV on the left. 


Turns out its pretty useful, although you have to remember to set it properly for each photo- tedious but rewarding! It's not automatic, but it can result in much more accurate color representation in your photos by removing a significant portion of the reflected light.

Using the CPL correctly can significantly increase the base quality of your captured textures. 
Note that on the ivy the CPL still can't remove all reflecting angles, but it does significantly improve the capture. 

Using a CPL


The CPL screws onto the end of your regular camera lens. If you end up buying one, make sure you get one for the correct diameter lens you have. You can find out the diameter by checking for a "Ø" symbol, followed by a number on the end of your lens, for example Ø52.


The CPL rotates freely once it is attached to the lens. As you walk around your subject, make sure to rotate the CPL until the amount of reflection you see on shiny surfaces is at it's minimum. You have to keep adjusting the CPL's angle, because as you walk around and face different directions, the amount and angle of the reflected light also changes. Make sure you adjust it for each image.

Buying a CPL


You can find the CPL kit I bought at this link. It's for a 52mm lens. I bought a cheapie, but it works well and doesn't mess with my image quality. Be careful to read reviews, as a badly made lens can result in distorted images or blurriness. I don't know of any reason to go super high end with a CPL, but feel free to let me know if you splurged and don't regret it.


Tuesday, April 11, 2017

Boulder

Even with a bunch of holes on the top, I was pretty happy with the result. I wasn't game to climb the rocks next to it due to the recent rain. What a chicken I am! This was taken near Marshall's beach in San Francisco.


Another 3D Guy- Raz Luta

One of my co-workers is also trying their hand at Photogrammetry, you can check out their SketchFab page here.

His first experiment had a nice result!

Photogrammetry Kit

I recently expanded my Photogrammetry kit with some simple additions that have made my shoots a little easier.

Full disclosure, the links in each kit description are links to the amazon pages I bought them from. 

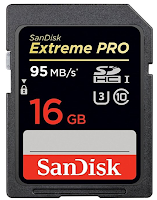
First off, I wanted a new SD card that I could use for Photogrammetry shoots. I was looking for a fast read/write speed so I went for a 16GB SanDisk Extreme Pro. 16GB? Even shooting in RAW format with my Pentax k-50 I can still get just over 1000 images in a single shoot, although in the future I imagine I will be getting a larger one.
Piccy Piccy 3D

Next up I wanted to try out a circular polarizing filter for my shoots. I found a super affordable lens filter set here and got it. The reviews were pretty good, and so far I've only used the CPL, but it's been good so far. It also came with a nice microfibre cloth which is handy, sure. I've never used a CPL before (because I am a noob photographer- hey, I'm a 3D guy, my cameras don't need CPLs) but the use of it is pretty straight forward. You rotate it until it's angle cancels out the reflected light. It's super useful if you are taking images of an object in a glass case for example, or something behind a window. It will pretty much make the reflections on the glass vanish from the right angle, which can make all the different for a photogrammetry shoot. I plan to test it out on some puddles.

Apparently the fiber cloth performs tricks. 

Finally, a camera bag that was big enough to fit the camera, lenses, color cards, filters, lunch and water! What a load. It also looks cool, if you are into that sort of thing. Yay for that. The bag is a little bigger than what I was carrying around before, but the extra room really comes in handy.
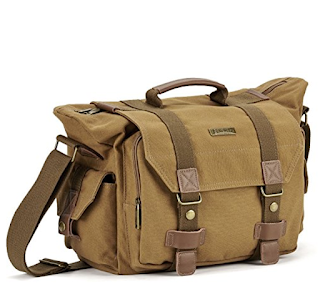
Oooh, spacious!

I got a couple of other bits and pieces- a color calibration chart and a lens hood I'm actually not super happy with, so I'm not going to link it here. I have not tried using the color chart yet, but I'll post about how useful it is later down the road in another post.

It wouldn't be a PiccyPiccy3D post without some 3d stuff... taking a stroll around Golden Gate Park I took some quick snaps of these bits and pieces. I was a-bit bummed out that the Mossy rock has a hole in the bottom, but sometimes when you think you have every angle... well, too bad. 


Tuesday, April 4, 2017

Bunker Door

I took this one a while back, just posting it up now. It's a door to the storage area of Battery Crosby in San Francisco, a coastal gun battery built at the turn of the last century. It's obviously seen better days.

I only took 18 shots, and if you look at the details and lower angles you can tell. I learned quite a bit about capturing buildings during this shoot, although most of the things I tried to capture didn't turn out so great.

Equipment:
Pentax k50

Lens:
55mm

Image Count:
18

Image format:
JPEG

Software:
Agisoft Photoscan

Monday, April 3, 2017

Beautiful Desolation

I wanted to share this video from STASISGame as I really like the use of miniatures in the photogrammetry shoot, and the resulting composited 2D Isometric artwork. Its a really clever use of the technique.

So what have I learned so far...

Taking stock of the things I have found helpful when capturing close up photogrammetry:

The shoot:
  • Overcast or cloudy days are ideal for capturing neutral lighting on models. Stark lighting looks pretty in the capture, but makes the resulting asset much less useful if the intention is to use it in a game engine. 
  • If you have a variable length lens, use either the minimum or the maximum. Ideally as close to 50mm as possible to minimize distortion. Agisoft Photoscan says it supports between 20-80mm, but I've got some good results with an 18mm lens too
  • Take Photos. Yeah, duh, but no, really, take more photos than you think you will need. It's easy to exclude some from the capture, but it's not so easy to get more pictures once you realize you missed some vital angles. 
  • Shoot in RAW if possible. It reduces noise, and helps for a better reconstruction. 
  • Shoot with the lowest ISO possible, which will also reduce noise. 
  • ANGLES! Get all the angles. 
  • Get close, take nice little detail shots, but make sure your pictures have a good amount of overlap, otherwise the software won't be able to place them.
  • Avoid reflective or transparent surfaces. Puddles, glass, shiny metal, it will mess up the processing of the capture. I've read that a polarizing filter can help, but I have yet to try it. 
  • Focus! Blurry photos will confuse the software and muddy your results. 
The subject:
  • I like to just go for a hike with my camera. There are amazing things to capture everywhere. I think it's funny that people won't look twice at a real traffic light, but upload it as a model online and people will just start poring over the details...
  • Not everything makes for a good capture. Reflective surfaces, very thin elements, repetitive elements, featureless areas and very dark areas can result in poor models. 
  • Small vegetation (eg; grass, leaves) and wind are the enemy- even slight movement in the subject can mess up your capture big time. 
  • Complex shapes need more care and attention to detail. Kinda sounds obvious, but this is one of those "ANGLES" and "Take Photos" tips really count. Photoscan knows nothing about the object other than what you tell it, and it can be hard sometimes getting all the angles. I tried getting a cool water valve the other day, covered in ivy, and I got *most* of it, but not enough to make a good model. 
  • Rocks, tree roots, bricks, doors- these are all good starting points. 
That's all I have for now!
This is from a shoot a couple of weeks ago that I only got around to processing today. I really liked the little mushrooms peeking through the bark. I was a little disappointed about the way the grass turned out, especially as I took a round of photos quite close to it. I have not yet been able to capture any fine vegetation detail, but maybe one day.

Equipment:
Pentax k50

Lens:
55mm

Image Count:
51

Image format:
JPEG

Software:
Agisoft Photoscan


Sunday, April 2, 2017

Old Gum Tree

I had read somewhere that 50mm lenses are ideal for photogrammetry, so I had been shying away from using my 18mm lens. This tree was particularly big, so I used the 18mm lens to get the whole tree root in each shot. That was super convenient. The results are pretty good, and if it is distorted, you can't really tell.

Equipment: 
Pentax k50

Lens: 
18mm

Image Count:
37

Image format: 
RAW

Software:
Agisoft Photoscan

Rocky rocks and rocky ground.

I took a nice walk along the cliffs near Golden Gate bridge and found lots of cool rocks to take many, many pictures of. Same strategy, walk an even circle etc, etc. I also changed it up a little bit and took some close up detail shots, which I think helped the details on the top of the Coastal Rock capture in particular.

Equipment: 
Pentax k50

Lens: 
55mm

Image Count(s):
"Ground" 41
"Another Rock" 35
"Coastal Rock" 21

Image format: 
JPEG

Software:
Agisoft Photoscan


Pine Tree

I was able to capture a lot of the tree- I circled it twice, once at eye level, and the second time holding the camera higher and angling it up. When I circled the object I would take approximately two steps, but this wasn't very precise as there were fallen logs and other trees along the way I had to avoid.

Equipment: 
Pentax k50

Lens: 
55mm

Number of images: 
55

Image format: 
JPEG

Software:
Agisoft Photoscan


My first attempt at Photogrammetry. I was inspired by some examples of Photogrammetry being used for game development on Star Wars: Battlefront and Beautiful Desolation.

Both games use the results of the Photogrammetry process in very different ways. In some ways I found the creativity of the 3D to isometric 2D art of Beautiful Desolation to be much more intriguing than the impressive use of photogrammetry in Star Wars: Battlefront's environments, partly because it was so delightfully unexpected.

I was so inspired, I jumped into the kitchen and took photos of some bread...


Sparse Cloud tests

I decided to do a couple of Agisoft Photoscan sparse cloud tests to see how the low poly models would look. Although the resulting geometry...